For good reason, eyebrows are often called the frame of the face. A well-sculpted brow can instantly lift your features, balance facial proportions, and enhance your natural beauty without heavy makeup. Brow sculpting is about creating the balance that is right for your face, not necessarily chasing trends.
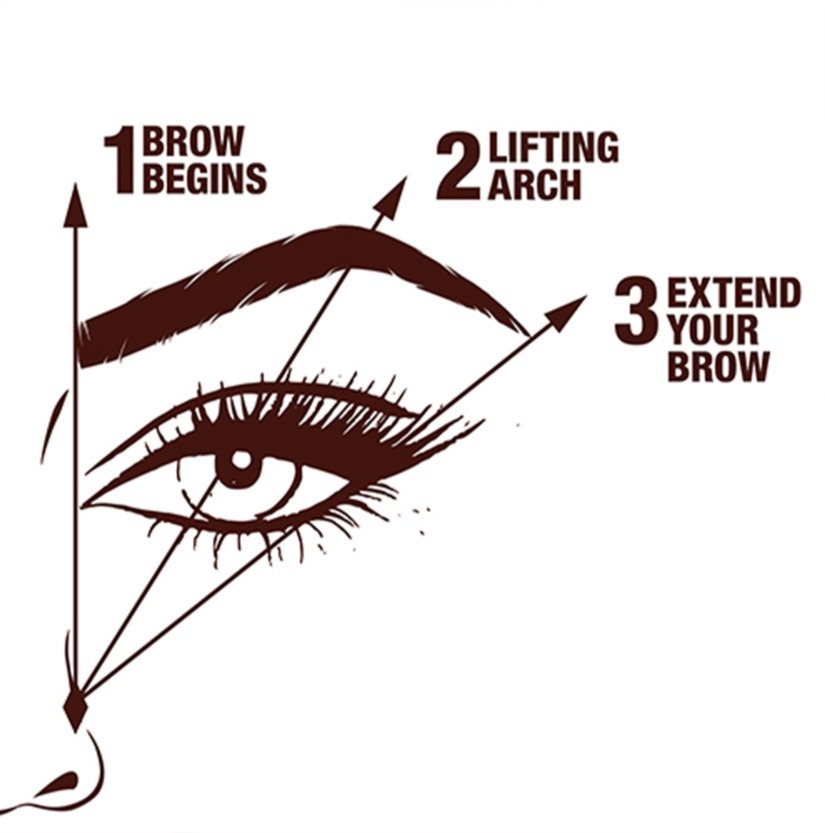
A well-sculpted brow can redefine your look, adding structure and symmetry to your face. To master brow sculpting, you have to first understand the anatomy of the brow. The brow consists of the head (inner, near the nose, vertical hairs), body (middle, widest, horizontal/slanted hairs), and tail (outer, tapering, slopes downward). Each part plays a crucial role in framing the face. The head of the brow should start at the bridge of the nose, the arch should peak above the outer rim of the iris, and the tail should taper off towards the temple.
“Brow Mapping” is the first step in effective brow shaping. It involves marking the head, body, and tail points of your brows to create a balanced look. This can be done using a brow pencil. Once the map is set, the next step is filling in sparse areas. Using a brow pencil or powder, lightly fill in the brows, mimicking the natural hair direction.
A variety of tools are available to aid in the perfect brows:
1. Brow Pencil or Pomade
Used to define shape and fill sparse areas.
Pencil: Best for soft, natural strokes
Pomade: Ideal for bold, defined brows
Choose a shade slightly lighter than your hair color for the most natural result.
2. Spoolie Brush
A must-have for blending and grooming which softens harsh lines.
Helps shape brows into place and create a fuller, more natural look.
3. Tweezers
Precision is key when cleaning up stray hairs.
Use slanted tweezers for control.
Only remove hairs outside your natural brow shape.
Less is more: over-tweezing is the most common brow mistake. There’s a reason why many of us millennials still have the ultra-thin Y2K eyebrows. We overplucked!
4. Brow Gel (Clear or Tinted)
Locks brows in place and adds polish.
Use clear gel for a clean, fluffy finish or tinted gel for added fullness and color.
5. Concealer or Highlight Pencil (Optional)
Used around the brow to sharpen the shape, and define the arch, it gives a lifted, professional finish.
source: charlottetilbury.com
The true magic of brow sculpting isn’t perfection. It’s balance. Brows should enhance and frame your face, not overpower it. Start slow, follow your natural shape, and build definition gradually. Whether you prefer soft and natural or bold and sculpted, the right tools and a thoughtful approach can completely transform your look one brow at a time.